Pages

Showing posts with label free patterns. Show all posts

Wednesday, September 21, 2016

Manly-Man Scarf

There are times when you have to knit a plain scarf for someone with a conservative sense of style.  But "plain" does not have to equal "boring!"  Pick the right yarn, like the subtly-fuzzy Aran weight Concept by Katia Cotton-Merino (which comes in several neutral colors and a few with subtle stripes) and you'll be done in no time and enjoy the process, too!  Look how happy I am to be working on it ... and how cute those stripes look when they're knit up!

Materials:
2 balls Concept by Katia Cotton-Merino in color 205
US size 10 knitting needles (straight or circular, your choice)

Directions:
Cast on 28 stitches.
(Knit 1, purl 1) across.

Pattern row: Slip first stitch of row as if to knit with yarn in back, purl 1, then (knit 1, purl 1) across.

Repeat pattern row until you have a few yards of yarn left, then bind off LOOSELY in pattern.

Friday, September 02, 2016

VVVVVery Quick V-Stitch Cowl

Sometimes you have a skein of fingering-weight yarn that doesn't want to be socks, either because it's too delicate to care for or too special to relegate to something you're just going to stick inside shoes anyway.  Single-ply yarns, cashmere blends, hand-dyed souvenir yarns from trips to far-flung yarn stores ... all of these can be showcased beautifully in this V-stitch crochet cowl.  The pattern is simple and easy to start and stop, making this the perfect on-the-go project, especially as gift-giving season approaches.

Materials:
  • 4.0 mm crochet hook (US size G)
  • 4.5 mm crochet hook (US size 7)
  • about 60 gm fingering weight yarn (I used Hedgehog Fibers' Skinny Singles from River Colors Studio in color Opalite)
Abbreviations:
SC - single crochet                ch - chain
DC - double crochet              sl st - slip stitch

Technique:
  1. Using the 4.5 mm hook, chain 84.  Join with a sl st, being careful not to twist.
  2. Using the 4.0 mm hook, chain 4.  DC in same chain as sl st.  [Skip chain, (DC, chain 1, DC) in next chain] around.  End round with sl st in 3rd chain of beginning of round, then sl st in the resulting ch-1 space to the left of where you just joined.
  3. Chain 4. DC in same ch-1 space as sl st.  [DC, chain 1, DC) in next ch-1 space] around.  End with a sl st in 3rd chain of beginning of round, and sl st in the resulting ch-1 space to the left of where you just joined.
  4. Repeat step 3 until cowl is desired length or you are not quite out of yarn (sample repeated the round 27 times).
  5. Using the 4.5 mm hook, chain 2.  [SC loosely in space between next 2 DC stitches] around.  End with a sl st in second stitch of beginning of round.  Fasten off and weave in ends.
Notes:
There's no reason this pattern has to be confined to fingering weight yarns. Just adjust the hook sizes to match your yarn choice (when in doubt, go bigger than you think you need, because you want the stitches to be flexible and soft).  Chain an even number of stitches that's big enough to slip over your head once it's joined into a circle, and get going!  For reference, I used 62 stitches with aran/chunky yarn (super fast project!) and 100 chains with heavy lace weight yarn (much slower going, but a totally awesome way to use the qiviut yarn I bought in Alaska).


Thursday, May 14, 2015

Crocheted Shoulder Cozy

Crocheted Shoulder Cozy
A free pattern from River Colors Studio and Lazy Mama Designs

You will need:
2 skeins Noro Silk Garden Sock (store sample used color S272)
1 crochet hook, size G

Reminder:  A single crochet decrease turns two stitches from the previous row into one stitch in the row you are making.  In this pattern it is worked as follows: insert hook in next chain-1 space, yarn over and pull up a loop; insert hook in following chain-1 space, yarn over and pull up a loop (there should now be three loops on hook); yarn over and pull through all three loops on hook.

Pattern:
Chain 204 stitches.  Being careful not to twist the chain, join the ends of the chain together with a slip stitch.

Setup Round: Chain 4, double crochet in second stitch from where you joined.  Chain 1, [skip a stitch, double crochet in the following stitch, chain 1] around to the beginning of the round, then slip stitch into the third of the beginning four chains.

Round 1: Chain 2, [single crochet in next chain-1 space, chain 1] around to the beginning of the round, then slip stitch in first chain of the beginning two chains.

Round 2: Chain 4, [double crochet in next chain-1 space, chain 1] around to the beginning of the round, then slip stitch into the third of the beginning four chains.

Repeat rounds 1 and 2 for a total of about 8”, ending with round 2.

First decrease round: Chain 2, [single crochet in next chain-1 space, chain 1; single crochet in next chain-1 space, chain 1; work a single crochet decrease (see above directions) using the next two chain-1 spaces, chain 1] around to the beginning of the round, then slip stitch in first of the beginning two chains.

Beginning with round 2, work rounds 1 and 2 until piece measures about 12” from the beginning chain, ending with round 2.

Second decrease round: Chain 2, [single crochet in next chain-1 space, chain 1; work a single crochet decrease using the next two chain-1 spaces, chain 1] around to the beginning of the round, then slip stitch in first of the beginning two chains.

Beginning with round 2, work rounds 1 and 2 until piece measures about 16” from the beginning chain, ending with round 1.  Fasten off, then use a crochet hook or darning needle to weave ends in.  Wash and block, gently stretching the fabric to maximize its length or width, depending on your preference.  After being washed and blocked to be wider, the store sample measures approximately 14”x 27” when laid flat (about 54” around at bottom).

Thursday, February 09, 2012

Free Pattern: Mario's Brother's Scarf

It all started when I tried making the Biryani Shawl, designed by MMario (Ravelry link).  I liked how the stacked yarnovers made an interesting design, but doing that in an ever-increasing triangle required too much pattern-reading for it to be an easy project.  After fiddling around with different yarns and gauges, I found a combination I really liked.  Erika at River Colors Studio donated the yarn to make the prototype, I knit like a maniac for a few days, and voila! A scarf!

(before and after blocking)

This is a great pattern to show off a yarn with long color changes - and it's an almost totally mindless project that's easy to memorize and easy to accomplish.  It's a win-win-win situation!  So, without further ado, I give you ...

Mario's Brother's Shawl
a free pattern by Lazy Mama Designs

Supplies:

  • 4.5 mm needles (straight or circular)
  • about 400 yards laceweight yarn (I used half a ball of Schoppel Wolle Lace Ball, in color Fuchsianbeet)
  • stitch marker

Instructions:

LOOSELY cast on 37 stitches - you may want to go up several needle sizes in order to get the cast on loose enough to block properly.

Note: You may find it's easiest to keep track of where you are in the pattern if you place a stitch marker near the beginning of Row 1, so that every time you start a row with the marker you know you're on the row where you do the [K2 together through back loop].

Row 1: Slip 1 as if to purl, K1, (K2, YO, [K2 together through back loop]) across to last three stitches, K3
Row 2: Slip 1 as if to purl, K2, (K1, YO, [K2 together], K1) across to last two stitches, K2

Repeat rows 1 and 2 until scarf is desired length.  I made mine about 60" long (unblocked).

Bind off LOOSELY, treating each YO stitch as follows: [K the YO stitch, bind it off loosely, move the loop from the right needle to the left needle, K1 through the back loop loosely].

Wet block severely to open the stitches.  Depending on whether you stretch it width-wise or length-wise, you can end up with a longer or wider scarf.  I blocked mine mainly for length, and ended up with a scarf that was 65"x10" after blocking.

***

Now, if you'll excuse me, I have another half of that skein left to play with for another pattern I dreamed up ...

Friday, March 19, 2010

Another thing to do with your kid's artwork

When Lazy Kid painted some lovely watercolor fruits this summer, I knew I was going to have to do something special to preserve them for posterity. One scan, 10 minutes of editing/cutting/pasting, and less than an hour of sewing later, I've got two new placemats for our table.

I used the inkjet-ready, colorfast cotton pages you can find at most sewing and craft stores. I set my printer to print photos at the highest quality, and they turned out pretty sharp:


After I got the Lazy Kid fabric printed, I dug out some of my favorite stash, which I've used to make curtains for my last two kitchens, and which happened to coordinate perfectly with the colors of the fruit. Score!


I sewed strips onto three sides of the art to get it to be the right height for a placemat, then sewed the larger block onto the side to make it the right width. Grabbed some coordinating fabric scraps for the back, found some batting that was just large enough to work, and made myself an inside-out (quilt) sandwich. Stitched around the outside but left an opening for turning, turned it right side out, then topstitched around the edge to help it lay flat and close the turning opening. Topstitched around the Lazy Kid art to help it lay flat, and it was done!

Now, the fabric I printed at home is only "washable," not actually washable, so I'm going to have to Scotchguard the living heck out of these before I let Lazy Kid anywhere near them. But once that's done, I have hopes that these will be cheering our table for the rest of the summer!

Friday, May 15, 2009

Free pattern - Circle towel

I picked up some inexpensive linen yarn while I was on vacation earlier this summer, and I had grand visions of making it into some sort of hand towel.  All of the patterns I could find seemed to involve rather a lot of mindnumbingly boring stockinette stitch, so I decided to modify a cool sock pattern to see if I could make a towel that had a nice texture and a pattern that was fairly easy to memorize.  
The modification was a little challenging since the sock is worked in the round and the towel is back-and-forth, but I managed to get my head around it all right. As a bonus, the back side is nice and uniform and looks presentable enough that it won't be horrible when it's seen during use.
Don't be freaked out by the 20-row pattern repeat ... it's actually just 10 rows with a slight jog over to make the second 10 rows, and there's a lot of "do the same thing, only K instead of P" in there, too.  Trust me - once you've gone through it once or twice, you won't need to look at the instructions for the rest of the towel.

So, without further ado, here's how to duplicate my Circle Towel:

Lazy Mama's Circle Towel:

Finished size - 17" wide x 12" tall before washing and blocking; size after blocking will be added once this makes it through the wash :)

Yarn - light worsted weight or DK weight linen or cotton yarn.  I used every bit of 100 grams of Euroflax Athens by Louet Sales, which is approximately 200 yards.

Needle - whatever gives you a nice medium-firm fabric in stockinette stitch.  You need it to be a bit loose to comfortably carry the slipped stitches up seven rows in the pattern.  I used a US 2.

Gauge - not important.  Just make sure you're not making a super-lacy cloth, or it won't hold up to actually drying your hands.

Pattern stitch (multiple of 8 stitches):
Row 1 - Purl across
Row 2 - Knit across
Row 3 - Purl across
Row 4 - (P3, sl 2 st with yarn at front, P3) across
Row 5-  (K3, sl 2 st with yarn at back, K3) across
Row 6 -(P3, sl 2 st with yarn at front, P3) across
Row 7 - (K3, sl 2 st with yarn at back, K3) across
Row 8 - (P3, sl 2 st with yarn at front, P3) across
Row 9 - (K3, sl 2 st with yarn at back, K3) across
Row 10 - (P3, sl 2 st with yarn at front, P3) across
Row 11 - Purl across
Row 12 - Knit across
Row 13 - Purl across
Row 14 - (sl 1 st with yarn at front, P6, sl 1 st with yarn at front) across
Row 15 - (sl 1 st with yarn at back, K6, sl 1 st with yarn at back) across
Row 16 - (sl 1 st with yarn at front, P6, sl 1 st with yarn at front) across
Row 17 - (sl 1 st with yarn at back, K6, sl 1 st with yarn at back) across
Row 18 - (sl 1 st with yarn at front, P6, sl 1 st with yarn at front) across
Row 19 - (sl 1 st with yarn at back, K6, sl 1 st with yarn at back) across
Row 20 - (sl 1 st with yarn at front, P6, sl 1 st with yarn at front) across

Note: after your first pattern repeat, the first row of circles may look a bit flat on the cast-on side.  This is normal, and will not occur in any of the subsequent repeats of the pattern.

Actual instructions:
  • Cast on 80 stitches.
  • Knit two rows of garter stitch (knit each row).
  • Begin pattern instructions, KNITTING FOUR EXTRA STITCHES AT THE BEGINNING AND END OF EACH ROW TO MAKE A GARTER STITCH BORDER.
  • Repeat pattern instructions a total of five times (100 rows in pattern).  If you are using a larger skein of yarn than I did, you may wish to keep repeating until you're almost out of yarn.  Just make sure you end on row 10 or 20 before you finish the rest of the towel.
  • Knit two rows of garter stitch (knit each row).
  • Cast off all stitches.
If you decide to make one of these, please share it with me on Ravelry!  Thanks!

Thursday, February 12, 2009

Last-minute greeting cards

Okay, so the package to the Lazy Grandparents needed to be in the mail today, and Lazy Kid wanted to make a Valentine's day card to go with it. Glitter glue wouldn't dry in time, so I hauled out Plan B: punching designs in cardstock with a hammer and nail.

1. Put a piece of corrugated cardboard on a solid surface (one you don't mind nicking up a bit if someone gets a little too excited with the hammer), then put the paper to be punched on top. I used regular cheapo cardstock for Lazy Kid's card, and some commercial blank greeting cards for my versions. Make sure you're looking at the inside of the card, poking the holes toward the outside of the card.

2. Use a lightweight hammer to force a thin nail through the cardstock into the cardboard (but hopefully not into the table under it), punching a small hole in the card. Repeat the process, placing holes no closer than about 1/4" apart (much closer together and the paper will tear, and then the kid will cry, and that's not the point of this, now is it?). You can lightly trace a design for the child to follow, or tape a pattern to the paper and remove it when all the holes are punched, or just let them wing it. Or, if you're really dumb, you can hold the nail while the kid hammers, which lets you control where the holes will end up, and also really, really hurts. Don't ask how I know this.

Lazy Kid's card, made with me aiming the nail (ow)
The bumps made by the nail pushing through will be different sizes depending on what size nail you use and how deep it penetrates, so if there's a specific look you're going for, play around with it on a piece of scrap paper before you let the kid go to it.

One of my cards - the outer heart followed a pattern, the inner one was done freehand

If you use a fairly large nail, you could even glue or tape a piece of colored paper behind the holes so the color would show through (and your traced pattern would be covered up), but it's really the texture of the holes that makes this so fun. I've made a bunch more this morning, whenever I could wrest the hammer away from my daughter. I love that our craft session included the sentence, "I want to make another card - where's the hammer?"

Tuesday, November 11, 2008

Binding tutorial now up on my new flickr account!

Check it out:
http://www.flickr.com/photos/32382769@N08/sets/72157608893740830/

Should take you to a set where the descriptions of the photos tell you how to do a standard quilt binding in 10 easy steps.

Feel free to leave feedback here or there - I'm always anxious to improve my work!

Monday, August 11, 2008

Free pattern - Lazy Lids

A lot of my personal projects lately have come from patterns that are available free online. In the spirit of good will and paying back all the designers who have shared their work for free, I'm putting up my awesomely easy hat as a free pattern for you to try. They make great holiday gifts, and they take so little yarn and time that you won't even mind (much) when the recipient loses one.

As with all of my patterns, please contact me if you'd like to make these for sale. I can usually be convinced, but it's going to cost you ... chocolate, if nothing else.

Lazy Lids


This knitted wool hat has an easy Fair Isle band that helps keep your head extra toasty. Instructions given for newborn, toddler, and adult sizes, plus tips on how to customize the fit. Please note that I added an inch to the toddler size after taking the photo but before writing the directions, so your kid's ears won't stick out like my kid's do :)

Unstretched Sizing:

  • Newborn - 14” around
  • Toddler – 17” around
  • Adult – 20” around

Materials:

  • Two partial skeins worsted weight yarn in coordinating colors. I used Wool-Ease in #104 Blush Heather and #140 Rose Heather, which is 3 oz/85 gms per 197 yards/180 meters. Any yarn of a similar weight should work, as long as you check your gauge
  • US size 6 double-pointed needles, and a 16” size 6 circular needle
  • Four stitch markers, tapestry needle, scissors, etc.
Gauge: 21 st and 24 rows = 4 inches on US 6 needles in stockinette stitch.
  1. With main color, cast on 73 (89, 105) stitches on the circular needle. If you’re making this a custom size, cast on a number of stitches that is one greater than a multiple of four (72+1, 88+1, etc.). Join, making sure not to twist the stitches. Mark the first stitch of the round with a marker or the tail of the cast-on.
  2. Work K2P2 ribbing to the last stitch before the join, then K2tog with the last stitch and the first stitch of the next round. 72 (88, 104) stitches.
  3. Continue in K2P2 ribbing for about 6 (8, 10) rounds, or until ribbing is desired height. Knit around one round, increasing one stitch somewhere in the round using any increase method. 73 (89, 105) stitches.
  4. Knit two or three rounds in the main color, then begin the Fair Isle pattern. This is just [K1(main color) K1 (accent color)] all the way around. As long as you’ve got an odd number of stitches, subsequent rows should end up with the colors forming a checkerboard (instead of alternating columns of color). Repeat this round until the Fair Isle band is 8 (10, 10) rounds high, or desired height. Cut the accent color yarn, leaving a 4-inch tail and complete the remaining steps using the main color.
  5. Knit 4 (8, 10) rounds, or until the piece is long enough to cover the person’s head from midway over their ears up to where their head starts to curve toward the top of the skull. The toddler size fits my largish 3-year-old and the adult size fits my largish adult woman’s head, so adjust the sizing accordingly if you’re knitting for someone with a huge (or tiny) noggin. Somewhere during all these rounds, do one K2tog to decrease back down to 72 (88, 104) stitches.
  6. Knit the next round, placing a stitch marker every 18 (22, 26) stitches.
  7. On the next round, knit to two stitches before the marker, then K2tog. Repeat this for each group around, and keep decreasing each group each row until you have 12 stitches between markers. Switch to working on the double-point needles instead of the circular whenever you feel it’s necessary.
  8. On the next round, knit 4 stitches then K2tog and repeat around. This will give you a decrease at the middle and end of each group of stitches.
  9. Next rounds: (K3 then K2tog) around. (K2 then K2tog) around. (K1 then K2tog) around. (K2tog) around. (K2tog) around. You should have four stitches left at the end of this last round.
  10. Cut the yarn, leaving about a 4-inch tail. Draw the yarn through the stitches remaining on the needles and fasten off, burying the tail inside the hat. If possible, try the hat on the intended wearer to make sure it’s long enough … if not, you can frog the rows with decreases and add a few extra rows of stockinette stitch before you redo the decreases. Trust me, it doesn’t take too long, and your recipient’s ears will thank you for it. When the hat is long enough, weave the ends of the yarn in on the inside of the piece, and voila! A hat!

Wednesday, May 14, 2008

Teaching a young child to sew

Yeah, okay, maybe I'm a little ambitious here, but Lazy Kid has mad skillz when it comes to small motor play, and she's bored with sticking laces through beads, and the laces on her lacing cards are so long they get tangled or so short she pulls them all the way through each hole. Plus, she just sort of laces the cards in a random order from random directions, so they don't look like anything when she's done. She gets really frustrated when she ends up with this tangled ball of nasty yarn with a cute cow lacing card buried in the middle. So what's a crafty mommy to do? Get all DIY with the problem, that's what.

And so, I proudly present a free tutorial on making your own learn-to-sew card for really young kids. Please note that this is a supervised activity - young children should NEVER be left alone with needles, even blunt plastic ones.

Materials:
  • A piece of cardboard (preferably corrugated, but definitely sturdy) about the size of a sheet of notebook paper
  • A pair of scissors sturdy enough to cut through the cardboard
  • A hole punch sturdy enough to cut through the cardboard (mine's a cheapy from Office Max, and it worked fine)
  • A marker/pen/pencil/crayon
  • A scrap of yarn about 2 feet long
  • A button that's larger than the holes the hole punch makes and that has holes large enough for the yarn needle to go through
  • A BLUNT tapestry needle, yarn needle or plastic canvas needle - preferably plastic

Steps:

  1. Punch a series of holes along one side of the cardboard, about 2" apart and as far in from the edge as the hole punch will go. Label the holes with numbers, either from left to right or right to left.
  2. Cut two smaller pieces of cardboard, each about 3-4" square. Punch two holes in each piece of cardboard, at approximately the same distance you used in step 1. Label these holes with two consecutive numbers, as in the photo below.
  3. Thread the yarn scrap through the needle, then even up the ends and tie them so that the needle will not come loose from the yarn. Thread the needle and yarn through one hole on the button, pulling the knot snug against the button. This will keep the child from pulling the thread all the way through the holes.
  4. First show the child how to sew on just the larger piece of cardboard, with the needle coming "up at 1" and "down at 2" and "up at 3" and so forth across the piece.
  5. Next, show the child how to "unsew" the yarn by backing the needle out through the holes, "down through 3" "up through 2" "down through 1" etc.
  6. Finally, show the child how to "sew" the smaller cardboard pieces onto the larger piece by holding them over top while sewing. You may need to make the holes in the smaller pieces a little larger (two hole punches side by side) so the child can easily see to put the needle through both holes at once.
Lazy Kid "sewed" the cards in the photo above with only minimal guidance from me - mostly I just had to remind her that the needle didn't always go in from the same side of the board (which wraps the yarn around the edge of the card instead of making a nice running stitch).

After she completed this she wanted nothing more to do with it that day, and the next day she just wanted to hold the needle and swing the yarn around, which was all fun and games until the button on the other end of the yarn hit her in the face (which is why you NEVER leave a child alone with a needle - did I mention that before?).

So no, my three-year-old won't be entering any embroidery at the state fair this year, but she DID have fun with this the first time, and I think it will be popular in the future once she gets over the button-to-the-face incident. And once she gets good with the cardboard, it's on to more floppy materials like felt (and quilting cotton!).

Let me know how this works for you!

Saturday, April 12, 2008

Ruffled Yo-Yo directions - as seen in Birds of a Feather April block of the month

Greetings, Block of the Month quilters! As promised, here are the directions for the ruffled yo-yos we used to decorate April's block of the month. Hope you enjoy making these as much as I do!

In all the photographs for the yo-yo construction, the lavender fabric is the “body” and the yellow fabric is the “contrast.”

For each ruffled yo-yo:
1. Using either scissors or pinking shears, cut a 5” circle of body fabric and place it face-up on your work surface. Now cut a 4 ½” circle of contrast fabric and place it face-up, centered on top of the body fabric.
2. Cut off an 18” piece of thread that coordinates with the body fabric and thread it through a handsewing needle. Knot the end several times so you’ve got a decent-sized knot.
3. With the pair of fabrics in front of you so that the contrast side is up, fold the closest edge of one yo-yo up toward the center of the circle – you should mostly see the body fabric. Push the needle through the body fabric and contrast fabric about ½” in from the edge of the larger fabric circle, pulling the knot snug against the body fabric.


4. Fold the edge of the fabrics toward you near where the thread comes through, forming a hem that is a little more than ½” wide on the largest circle. You only need to hold about a thumb’s width of the edge folded over at one time – if you try to fold too much, you’ll run out of fingers to hold it in place and the folds will end up straight instead of sort of curved.
5. To lock the knot in place, push the needle down through all four layers of fabric near the fold about 1/16” to the right of where the thread comes through the hem. Now push the needle back up through the hem and body, about 1/16” to the left of where the thread comes through. Pull the thread through so that there is no slack.

6. Hem the edge of the whole circle with a running stitch, making the stitches about ½” long and as close to the folded edge of the fabric as you can. The longer the stitch, the smaller the hole in the middle of the finished yo-yo. The fastest way to do this is to rock the needle up and down a few times, taking several stitches before you pull the thread through.


7. Leave the stitches loose so there’s plenty of room to work while you sew. When you make it all the way around the yo-yo, take one last stitch to the left of the original knot, then pull the thread tight to gather up the stitches in the center of the yo-yo.

8. Squish the yo-yo flat so the hole is in the center of a gathered circle and the ruffles are spaced evenly around the hole. Take a small stitch in the edge of one ruffle near where the thread is coming out from your last stitch, but don’t pull the thread taut yet. Now put the needle through the small loop of thread you’ve got left from your last stitch, and pull it taut to make a knot around the edge of the gather. Repeat this to make a second small knot.
9. Now push the needle through the hole to the inside of the yo-yo, feeding it along one ridge of a gather until the point comes out near the edge of the yo-yo. Pull the needle through and pull the thread snug. This should have buried the tail of the knot inside the yo-yo.
10. Knot the thread on the edge of the yo-yo by taking a tiny stitch and putting the needle through the loop formed by the stitch (as in step 8). Place the yo-yo in the desired location on the quilt block.

11. Take a tiny stitch into the surface of the quilt block and then back through the edge of the yo-yo, but do not pull it all the way taut yet. Push your needle through the small loop of thread you have left in the stitch and pull it taut to make a small knot.
12. Secure the yo-yo all the way around the edge at approximately ¼” intervals, using a whip stitch that catches the edge of the yo-yo and travels along the back of the quilt block from stitch to stitch. 13. When you reach the beginning of the stitching for the yo-yo, take another tiny stitch, pull your needle through the loop of thread, and pull it taut to make a small knot. Now feed the tip of the needle into the edge of the yo-yo, pushing it along the ridge of one gather until it emerges in the hole in the center of the yo-yo. Snip the thread near the center of the yo-yo.


Saturday, March 15, 2008

FREE PATTERN - Very Vernal Placemats


I developed this pattern as a free giveaway for Birds of a Feather in Avon, Ohio. If you're in NE Ohio, I can highly recommend that you stop by and say hi (and pick up a pattern while you're there spending lots of money on cool fabric and yarn). If you're not in NE Ohio, you're in luck, because I'm posting the pattern here!

Directions:
1. Cut one 13”x17” rectangle each from front fabric, back fabric, and batting.
2. Lay batting flat on a work surface, smoothing out any wrinkles. Lay back fabric face-up on top of the batting, smoothing out the wrinkles and matching the edges.
3. Lay the front fabric face-down on top of the back fabric, smoothing out the wrinkles and lining up the edges as best you can. Secure all three layers around the outside of the rectangle, using straight pins or quilt binding clips.
4. Using a 1/2" seam allowance, stitch around the perimeter of the rectangle, pivoting at the corners and leaving about a 4” opening for turning.
5. Trim the corners on the diagonal close to the seam to eliminate the extra seam allowance. Turn the placemat right-side-out through the turning opening, finger-pressing the seams flat and making sure the corners are completely turned.
6. Pin or binding-clip the edge of the placemat all the way around, folding the extra seam allowance inside at the turning opening. Topstitch about 1/4" in from the edge all the way around the edge of the placemat.
7. Trace desired template from the end of this post onto paper or cardstock (you'll need to size it up, since I can't get it to show as full size - the egg is about 7" long and the flower is about 5" long). Cut scrap strips to be 2 1/2" wide or narrower, using a pinking blade if desired. Sew the long edges of two scrap strips together with a 1/4" seam, holding the wrong sides together as you sew so that the seam allowance ends up on the right side. Press seam open. Repeat, adding strips on to the ones you’ve sewn until you have a block that’s at least as large as your template.
8. Cut appliqué shapes from the strips you’ve sewn together, pinking the edges if desired.
9. Use temporary spray adhesive to adhere the appliqués to the placemat in desired locations.
10. Use a free-motion foot or darning foot to stitch around the edges of the appliqués, stitching about 1/4" or less inside the edges of the shape.
11. Complete quilting as desired.

Friday, March 14, 2008

Coming soon to a blog near you

Gotta finish the editing on the new FREE PATTERN, but it will be up sometime tonight or tomorrow, good Lord willing and the creek don't rise. Here's a peek to hold you over until then ...

Tuesday, February 12, 2008

Free project - Fabric postcard Valentines

I made these with my not-quite-three-year-old daughter for her preschool classmates. She picked out fabrics and manned the glue stick; I manned the sewing machine and occasionally told her where to stick things down. It probably took me under an hour to make the five I needed for her class.

Supplies:

  1. Sew fabric scraps together until you have a piece that's at least 4"x6". Repeat to make a second piece.
  2. Use the glue stick to apply glue to one side of the interfacing or Timtex, then adhere it to the wrong side of one of the pieces you made in the first step. Repeat for the other side of the interfacing or Timtex.
  3. Zigzag stitch or serge around the edge of the interfacing or Timtex, making sure you drop the needle off the edge so that one side of the zigzag is sewing through just the fabric. Trim the excess fabric, being careful not to cut into the stitching.
  4. Use the glue stick to apply glue to more fabric scraps, then adhere them to one or both sides of the postcard.
  5. Stitch slightly inside the edge of these fabric scraps to raw-edge applique them to the postcard.
  6. If you wish, stitch a message onto the postcard (use a darning foot, drop your feed dogs, and spell it out in cursive ... or program your fancy sewing machine to embroider it for you, Ms. Lazypants!)

Tuesday, December 18, 2007

Free pattern - The (Almost) No-Sew Fairy Skirt

What you'll need:
  • One yard of each of four different colors of tulle or netting (finer works better - don't make more than one of the colors out of the really stiff stuff, or it'll be too itchy). This will make a skirt that's about 18" long - if you want it longer, just double the length of skirt you want, and buy that many inches of each color tulle.
  • One 10-yard spool of each of two different colors of 1/4" ribbon
  • A piece of 1-inch non-roll elastic that's large enough to fit the waist of the child snugly with about 1" of overlap at the ends

What to do:

  1. Overlap the ends of the elastic by about an inch, making sure you don't have the elastic twisted. Machine- or hand-sew the edges together through the overlap. If you think you may have to make the skirt larger in the future, use thread that's easy to see, and don't overlap your stitches much or it will be a pain to take out.
  2. Cut the tulle or netting into strips that are 36" long by about 4" wide. I do this by folding it in quarters and using a ruler and a rolling cutter, but you could use scissors if you had to.
  3. Cut the ribbon into pieces between 30" and 36" long (shorter for older kids, so you can get more pieces out of the spool).
  4. Fold one piece of tulle in half and put it under the elastic so that the fold is in the middle of the elastic circle and is toward your right. It isn't essential to have the ends of the tulle exactly even - in fact, it probably looks better if you don't.
  5. Use the tulle to make a slipknot around the elastic - bring the ends of the tulle up over the elastic and tuck them through the loop in the tulle, then pull the ends back to your left to tighten it around the elastic. You want it snug but not so tight that it rolls the elastic.
  6. Repeat steps 4 and 5 for the remaining tulle and ribbon, alternating colors in whatever order you choose. Use enough strips to cover the elastic, but don't pack them in there so tightly that it starts getting weird looking. You should end up with a waistband that looks like this:
  7. Now comes the annoying part. In order to keep the slipknots from, well, slipping, you need to tie the tails together. To do this, take one tail from color A and tie it to one tail of color B. It doesn't matter if you use a square knot or a granny knot or some fancy thing you learned in Girl Scouts 20 years ago - just tie the suckers together. Then take the other tail of color B and tie it to one tail of Color C. Take the second C tail and tie it to a D, etc. You'll end up with each color tied to the color on either side of it. This will give you a waistband that looks like this:
  8. If you want, tie bells to the ends of some of the ribbons (or sew them to the elastic waist), or glue on fake flowers or sequins or whatever suits your fancy. The more sparkly and crusty it gets, the more the kid is going to like it ... and the less washable it will be, so use your judgement about how fancy it needs to get. Oh, and you may want to spray the skirt with Static Guard every once in a while - otherwise, the skirt tends to climb up the kid's body, eventually engulfing their mouth and asphyxiating them. Well, not really, but it IS sorta annoying to have the top layer of tulle stuck to you.

Please note that this pattern is for personal use ONLY and may not be reproduced except for your own use. If you wish to make these to sell, please contact me to secure permission. I'll probably give it to you, if you ask nicely and send me cookies (and a check).

I hope you enjoy this project - and that you send me lots of pictures of kids wearing your finished creations! I'd love to start a group on flickr, if we get enough fairies out there :)


Saturday, September 29, 2007

Free pattern: Basket o' Entrails, as seen in the Zombie Bunnies pattern

Abbreviations:
sc = single crochet
yo = yarn over

Note: Except for the handle, the basket is worked in the round, with no slip stitches between the end of one round and the beginning of the next. You may want to use a stitch marker or piece of yarn to mark the first stitch of each round.

Also, if you've made a Zombie Bunny, you don't need to read the directions for the first five rows - they're the same as for making the body of the bunny.

For the basket:
Row 1: With accent color, make a circle with about a 6” tail.

Put the crochet hook through the circle, yo, and pull a loop through the circle; yo and complete the sc. 
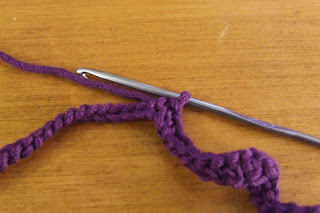
Repeat this six more times, for a total of 7 sc around the circle. The first stitch is always a little scrunched up and is really hard to use, so just ignore it for the rest of these instructions and pretend that you only have 6 sc in the row.
Pull the tail of the circle to tighten it – you should end up with a tiny circle of 6 stitches with no hole in the middle.

Row 2: Make 2 sc in each sc around the circle (12 stitches).
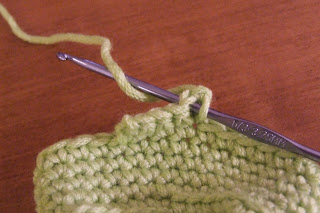
Pointer: You may find it helpful to use a stitch marker of some kind to mark the first stitch in each row. You can buy plastic markers at craft stores, or you can pin a safety pin around the stitch. Or you can just lay the tail of the yarn across the work before you start the first stitch of the row (photo on the right above), then pull it out and replace it when you get back around to it. Fewer things to buy and pieces to lose, which is always good around our house.
Row 3: (2 sc in first sc, then 1 sc in following sc). Repeat around (18 stitches).

Row 4: (2 sc in first sc, then 1 sc in following 2 sc). Repeat around (24 stitches).

Row 5: (2 sc in first sc, then 1 sc in following 3 sc). Repeat around (30 stitches).

Row 6: Sc through the back loop only of each sc in the round (30 stitches). Just ignore the color change in the photo below - to match the sample you'll continue in your original color.

Rows 7-12: Sc through both loops (that is, make a normal sc) in each sc in the round (30 stitches per round).

Row 13: Sc in each of the next 5 scs, then chain 1 and turn the piece over so that the inside of the basket is facing you.

Rows 14-37: Sc in each of the five stitches in the handle, then chain 1 and turn the piece.

Row 38: Sc in each of the five stitches in the handle, then cut the yarn leaving about a 10" tail, yo and pull the tail through the last loop on the hook to finish off the handle. Use the tail to attach the handle to the other side of the basket. Weave in the ends.

To make the entrails:

  • In the main color, chain 61.
  • Starting with the second chain from the hook, sc in the next 20 stitches. As you crochet, the chain should start to corkscrew around itself.
  • Now chain 21, then starting with the second chain from the hook, sc in each of the next 20 stitches. You should be back at the point where this chain branched off from the original 61-stitch chain. Repeat this step as many times as you like to make as many "branches" as you think will look good in the basket.
  • Sc in each of the remaining stitches in the original chain. Cut the yarn, leaving about a 4" tail, then yo and pull the tail through the last loop on the hook to finish off. Weave in both yarn ends.
  • For added security, you may want to make a couple of stitches with a needle and thread through both the bottom of the basket and the entrails, just to keep them from falling out or getting lost during play.

Note to self: Get a manicure before shooting the next batch of crochet photos.